Traditional light microscopy is a popular method for industrial quality control, delivering a high level of accuracy in both inspection and metrology. Its success is reflected in its persistence throughout the ages as a core technique, and the novel approach of opto-digital technology now builds upon this success.
Opto-digital technology offers many advantages over traditional light microscopy, and can improve the success of quality assessment tasks within almost any manufacturing environment.
An accessible solution for advanced inspection and metrology
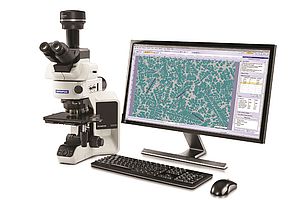
Digital technologies are becoming the norm in many areas of our lives. Following this trend, the new category of microscope takes the best of both worlds from optical and digital technologies, for the efficient management of industrial quality control workflows. Opto-digital microscopes are based upon modern microscopy techniques, controlled and displayed through a digital imaging interface to achieve a simplicity that is intuitive to any operator, regardless of experience.
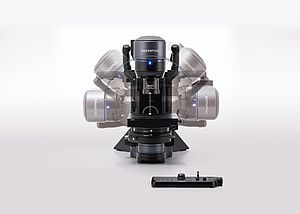
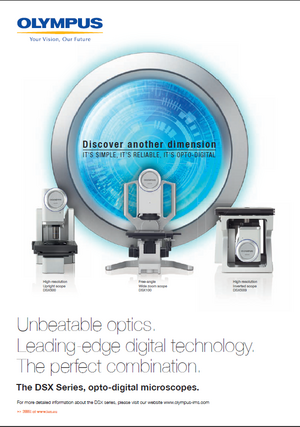
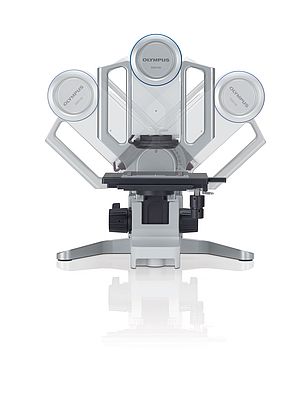
The opto-digital concept is one pioneered by Olympus, and currently consists of two types of microscope system. For high resolution inspection and measurement, the Olympus DSX series provides opto-digital inspection and measurement solutions for a range of sample types. The Olympus LEXT OLS4100 3D confocal laser scanning microscope (CLSM) is instead optimised for non-contact and non-destructive surface inspection and metrology.
Accurate inspection and measurement no longer depend on in-depth microscopy knowledge, due to several innovative features in both the system and software design. With both digital capture and display, the eye-piece has become a thing of the past. Working at the microscope over extended periods of time has always been uncomfortable, and the opto-digital microscope instead displays the image on a monitor for comfortable operation. Furthermore, on-screen viewing is much better suited for multiple users, for discussions or training.
Reporting functions are also efficiently managed on the opto-digital platform, which presents a complete investigation, measurement and reporting platform. Observation settings are presented alongside results, so analysis and measurement information can be rapidly fed back to R&D or production, or shared for training purposes. Faster analysis enables faster decision making, and opto-digital technology presents a more efficient means of quality control.
Selecting the best imaging technique
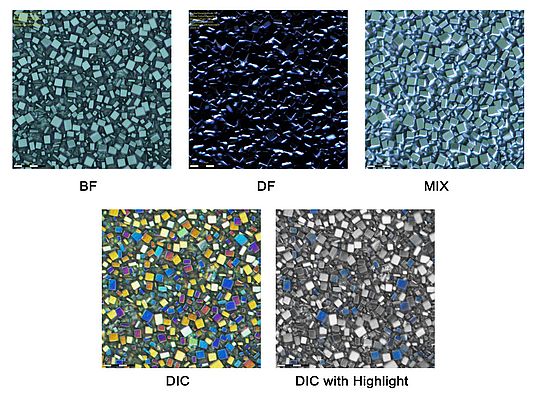
For operators who may lack the experience to know exactly when they should be using a certain technique or setting, Olympus has incorporated a unique "best image" function into the DSX series, providing an on-screen display of multiple capture settings. Possible techniques include the new highlight function, which facilitates inspection by pointing out specific features of interest in a chosen colour, against the remaining sample shown in greyscale. Allowing the user to pick the most insightful imaging technique, the best image function also presents an ideal resource for operator training. Since samples are shown captured using a range of optical techniques, a new operator can learn by example when to use a particular observation method.
Analysis through transparent layers
Inspection of printed circuit boards (PCBs) can often be hampered by the presence of transparent layers covering the surface. The laminate layer obscures the underlying surface, and a sharp image cannot be obtained with standard light microscopy. The Olympus DSX opto-digital microscope incorporates polarised light illumination, reducing reflection from this top laminate layer, allowing accurate inspection of the PCB.
Surface inspection and metrology
Surface topology is an important property in many areas of manufacturing, and different applications each demand a defined level of surface roughness. While roughness dictates the interaction between two surfaces, irregularities can form nucleation sites for cracks or corrosion. The CLSM, such as the Olympus LEXT OLS4100 really comes into its own as an optical profilometer, affording several major benefits over traditional contact profilometry. Laser scanning is rapid, and unlike the stylus tip of the contact surface roughness gauge, the laser will not damage delicate samples, while results are not affected by adhesive surfaces. Furthermore, whilst the resolution of contact profilometry is limited by the stylus tip diameter (a radius of 2 µm), the laser of the Olympus LEXT OLS4100 can measure down to 0.2 µm.
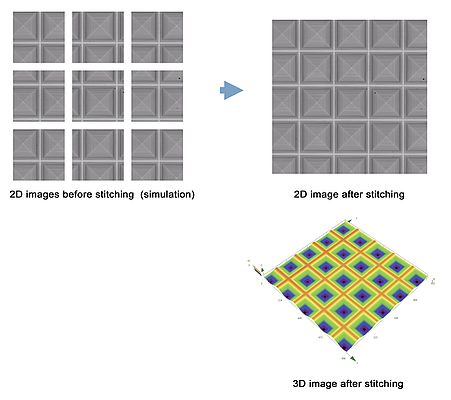
Drawing on the benefits of digital functionality, with the opto-digital microscope the field of view is vastly expanded with a stitching function, allowing the inspection of larger samples. Hundreds of individual capture areas are automatically assembled into a single wide-field 3D image, which can then be rotated, expanded and reduced on the digital screen view.
Optical profilometry is becoming an increasingly popular solution for industrial surface inspection and metrology, especially now that the Olympus LEXT conforms to the first ever geometric product specification standard for 3D surface metrology, ISO25178. This new standard defines 3D surface texture parameters, and also describes associated specifications such as the measurement technologies, calibration methods and software.
The digital future of light microscopy
In recent years, light microscopy techniques have been rapidly advancing in both performance and complexity. Opto-digital technology benefits from these developments, making them accessible for operators at every level of expertise. As such, opto-digital technologies are ideal for the management of complete industrial quality control workflows, streamlining the imaging, measurement and reporting stages of many tasks through rapid and intuitive operation.
Opto-digital technology has really taken hold within industrial quality control, and it is therefore conceivable that within the next few years the opto-digital microscope will become a standard tool for quality assessment within many industries, bringing industrial quality control into the digital era.
