Today, when a part is designed, developed and produced, more points must be controlled, and more data are needed for the inspection. These numerous data are obtained by measuring many parts, and these numerous acquisitions are obtained by carrying out several controls and manipulations. While such repetitive tasks, essential to the quality control of these complex assembly designs and free forms, can be carried out by human resources, there is no added value to having people perform them.
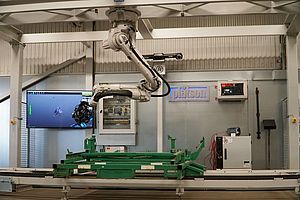
Following the trend of assembly lines, robots are more than capable of executing these repetitive tasks of taking measurements and acquiring data. This way, human resources can be relocated to other responsibilities that require their contribution of skills and knowledge – robots are there to replace tasks, not people.
In the current context of lack of manpower and limited working time, robots offer a valuable solution because they can be used to complete certain repetitive tasks, freeing up human resources for work that adds value. This solution proved to be effective on the assembly line, and it can be applied to quality control in the same way to increase productivity.
Turnkey Automated Inspection Solutions
The best option for the non-experts in robotics who want to use robots to increase productivity is to go with a turnkey automated quality control solution. This type of solution, already packaged, offers a large number of advantages such as accessibility, flexibility, and simplicity.
Accessibility
Implementing robotic cells in production usually involves three phases: design, deployment, and operation. Turnkey solutions enable metrologists to skip the first two steps, as the cell has already been developed and is ready to be deployed. This way, they can start using the inspection solution more easily and quickly. In addition to saving time, there is also money savings, because the company does not have to pay for the design and integration phases.
Moreover, turnkey automated inspection solutions have been designed with the needs of non-experts in mind. Therefore, they are easily and quickly accessible. They are also optimized for repetitive tasks in order to increase the productivity of manufacturing processes while offering the best accuracy in an industrial context. The Creaform CUBE-R is an excellent example of such a turnkey solution.
CUBE-R
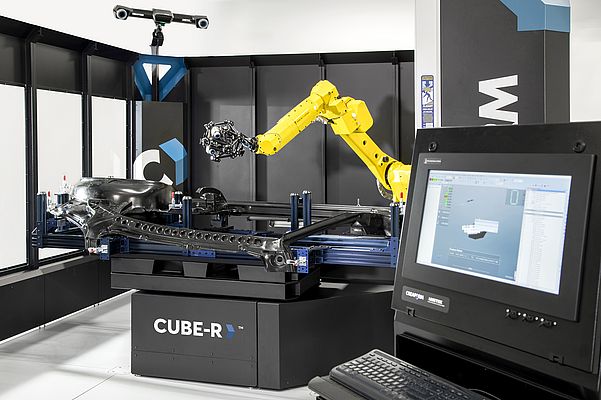
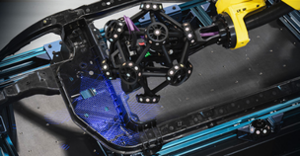
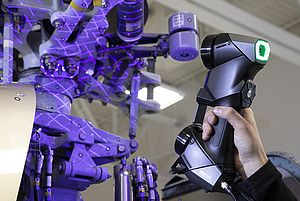
The Creaform CUBE-R is an accurate turnkey 3D scanning CMM. This solution consists of a MetraSCAN 3D-R—a powerful robot-mounted optical 3D scanner—and an enclosure ready to be installed in the manufacturing process, directly at the production line. Its interface is easy to use, maximizing automatic inspections and minimizing interactions with the operator. Its design is robust, adapted to industrial environments, and optimized for inspections on the production floor.
By comparing a machine such as the CUBE-R—made of a robot and a scanner—with a traditional machine made of a CMM and a touch probe, it is clear that the first allows for an increase in productivity without a loss in accuracy and volumetric precision. Quality control managers, who are non-experts in robotics, will be able to use a turnkey solution to optimize the repetitive tasks for which human contribution does not offer added value. Thus, they will be able to relocate these human resources to more important tasks.
Flexibility
The productivity needs of manufacturing companies differ by industry. In aerospace, the volume of parts is low, while the variability and mix of models are high. In automotive, it is the opposite; the volume of parts is high, while the variability and mix of models are low. Thus, the quality control solution must be flexible because the parts to inspect are likely to change a lot. Moreover, the scanning solution must be flexible enough to digitize any type of finish, regardless of complexity, without surface preparation.
Simplicity
However, such a need for flexibility requires ease in programming. A 3D software platform such as Creaform VXelementsTM combines all of the essential tools needed for data acquisition into a sleek, simplified, and user-friendly interface. This integral part of the turnkey solution combines real-time visualization capabilities with real-time performance indicators and a simple, yet efficient, 3D scanning experience. Thus, the 3D software suite combined with the turnkey aspect of the automated solution makes the quality control equipment even easier to use.
Productivity Gain
With turnkey automated quality control solutions like the CUBE-R, manufacturing companies can increase productivity.
The productivity gain makes it possible to:
- Measure more parts per hour with the same number of dimensions.
- Measure only the critical dimensions on a larger number of parts, increasing the number of parts measured per hour.
- Measure the same number of parts but get more information on each of these parts to build a history in order to present better traceability. Thus, in case of a default, the origin of the problem can be quickly located.
- Measure more parts and more dimensions per hour.
In short, a turnkey automated inspection solution such as the CUBE-R offers the best of both worlds: productivity and accuracy. Above all, the CUBE-R is an accessible, flexible, and simple measurement tool that gives control quality people access to robotics. By incorporating robotics into quality control, the benefits are significant.
The increase in productivity is certainly the most important, allowing for more dimensions and more parts to be inspected in less time. Robotics can increase productivity by relocating human resources to value-added tasks and increasing the number of parts and/or dimensions measured, with the ultimate goal of controlling the quality of 100% of dimensions on 100% of parts.
