Author: Mark Howard, General Manager, Zettlex UK Ltd
Introduction
As a very general rule, it's preferable to measure directly the position or speed of the object that you are interested in. In many instances, practical problems of physical environment or space constraints mean that this is more easily said than done. Nowhere is this truer than with angle measurement on shafts with a diameter of more than a couple of inches. The traditional approach is to measure angular position or speed indirectly - typically inferring the shaft's position from measurements made elsewhere. This article describes the traditional approach and a new, direct approach enabled by inductive sensors.
Traditional approach - indirect measurement
Potentiometers, resolvers and optical encoders are the most common devices for measuring shaft angle. Potentiometers offer a simple, low cost solution but are unsuitable for harsh environments, high reliability applications or continuous rotation. Resolvers are reliable in tough conditions but their bulk, weight or cost (for high precision devices) means that they are rare outside the defence, aerospace, oil & gas sectors. Optical encoders are not as robust as resolvers but are widely available and most mainstream units are keenly priced. Most optical encoders have a small (typically <1/2" diameter) input shaft with incremental pulse output. Through shaft versions are available but the bore is usually limited to <2". Above this, encoder prices increase dramatically and availability dwindles.
So how do you measure the angle of a large diameter through shaft? Traditionally, a smaller, secondary shaft is driven from the larger primary shaft and the angle of the secondary shaft is measured. In other words, the angle of the primary is measured indirectly and hence inferred. For many years, this has been the approach in gun turrets, rotary tables, radar antennae, security cameras, large motors, medical scanners and telescopes. Since the secondary shaft is smaller, there is a wide choice of rotary encoders. If absolute (rather than incremental) angle of the primary shaft is required, then additional gearing or a multi-turn encoder can be used.
Problems with indirect measurement
The angle of the primary shaft is calculated from the angle of the secondary - assuming that their relative rotation is proportional. Not unreasonable? As ever, the devil is in the detail and, in practice, there are problems with this assumption.
As a general rule, if the required measurement accuracy is significantly less than 1 degree, indirect measurement is probably not going to work reliably - or at least not for long. There are two parts to the problem - accuracy and reliability.
Inaccuracy comes from the number of factors in the system's tolerance stack up. For a system coupled by gears, these factors include, but are not limited to: encoder accuracy; encoder thermal coefficients - i.e. drift in output due to temperature; differential thermal expansion in gears, shafts, bearings, mounts, etc.; gear backlash; gear wear; concentricity of gears on shafts; gear train/tooth strain versus torque; shaft concentricity; variation of gear position with shock or vibration; tolerance on gear tooth position ; tolerance on primary and secondary shaft centres; variation in shaft centre distance - due to load/bearing clearances; variations from lubrication - due to amount, type and viscosity; mechanical friction - especially stiction; effect of foreign matter on gear teeth; twist due to torque in shafts; shaft bending; variations in assembly tolerances between first fit and servicing.
Each of these effects alone is probably not a major influence on accuracy. The problem arises because all these effects stack together. A similar, but longer and more diverse, list occurs in systems which are coupled by v-belts, timing belts or chains.
A common misconception in #1 is that an encoder with 1,000 counts per revolution is accurate to 1/1000th of a rev. Unfortunately, resolution is not the same as accuracy.
As regards reliability, most engineers know that the reliability of any mechanical system is proportional to the number of parts in it - especially moving parts. Gear, pulley or chain systems are susceptible to foreign matter. This can often be overlooked by engineers who expect their equipment will be operated within the specified envelope and all servicing will be done by skilled personnel who always replace components in the way that they were originally installed.
Experience shows this is wishful thinking. Foreign matter often arises from unexpected, sometimes bizarre, conditions. Examples of foreign matter to consider are dust, sand, mud, rain, snow, ice, hail, condensation, insects, rodents, rodent waste, mould, fungus, rogue mechanical tools, rogue mechanical fasteners, swarf, particles, coffee, cola (which is corrosive), pollen, air-borne seeds, vegetation, water residue, smoke/cordite residue, insect faeces/secretions, snails, worms, brake/clutch dust, hair and textile fibres. Far-fetched? No - experience shows that unexpected foreign matter is to be expected.
A new approach - direct measurement
As a general rule, if the position of an object is to be measured accurately then the measurement should be made at, or close to, the object. Measuring shaft angle directly simplifies the system and reduces the tolerance stack up. The result: improved accuracy and reliability.
So why doesn't everyone use direct measurement? The reason is that, until recently, large bore rotary encoders were disproportionately expensive, delicate and difficult to fit. Ring style optical encoders have been around for years but are expensive, bulky, need careful installation and are prone to failure with foreign matter. Similarly, large bore or 'pancake' resolvers have been around for years but their price, complex electrical supply/signal processing and bulk make them unsuitable for most mainstream applications.
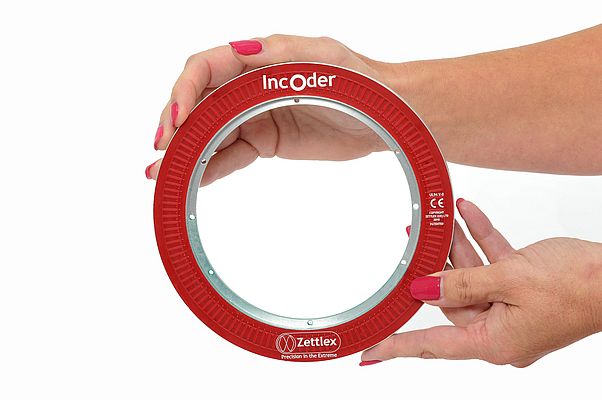
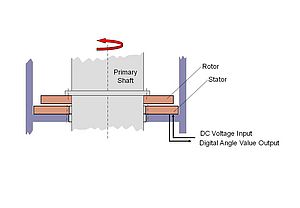
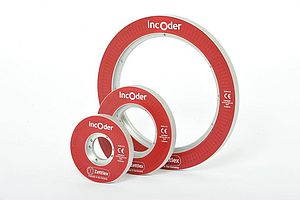
A new generation of inductive encoders enables simple, effective and accurate angle measurement for large diameter shafts. These devices work on similar principles to contactless resolvers and are just as robust and reliable. Rather than wire spools or windings they use printed, laminar windings. This enables a low profile, annular encoder ideally suited to large through shafts. Unlike their optical counterparts, these devices do not require precision installation and the electrical interface is straightforward - DC voltage in; absolute digital data out. The mechanical arrangement of these new generation devices is simple and eradicates all gearing. The result: a simple, easily installed, compact, lightweight, low inertia, accurate and reliable solution.


