Traditional approach: indirect measurement
There are many devices for measuring shaft angle. Potentiometers, resolvers and optical encoders are the most common. Potentiometers offer a simple, low cost solution but are not suitable for harsh environments or continuous rotation. Resolvers are reliable even in tough conditions but their high cost, weight and bulk mean that they are rare outside ‘high spec’ sectors such as defence, aerospace, oil & gas.
Optical encoders are not as robust as resolvers but are widely available, keenly priced and are an automatic choice for some engineers. There are many types of optical encoder; the most popular have a small (typically <1.25cm diameter) input shaft with incremental pulse or absolute digital output. Through shaft versions are available but the bore is usually limited to<5cm. Above this, encoder prices increase dramatically and availability dwindles.
So how do you measure the angle of alarge diameter through shaft of, say, 7.5cmor larger? Traditionally, a smaller ‘secondary’shaft is used and its motion geared to the larger ‘primary’ shaft. In other words, the angle of the primary is measured indirectly from the angle of the secondary. For many years, this has been the approach in gun turrets, rotary tables, radar antennae, security cameras, large motors, medical scannersand telescopes. Large bores are often needed for slip rings, cables, hydraulic pipes or fibre optics.
The motion of the secondary shaft is usually geared from the primary shaft but it could also be driven from a toothed belt or chain. Since the secondary shaft is usually small, there is a wide choice of rotary encoders and mechanical mounting is easy. If absolute (rather than incremental) angle of theprimary shaft is required, then additional reduction gearing or a multi-turn encoder can be used.
Problems with the ‘indirect’ approach
The angle of the primary shaft is calculatedfrom the angle of the secondary – assuming that the rotation of the secondary varies proportionately with the primary. Not unreasonable? As ever, the devil is in the detail and, in practice, there are problems with this assumption. As a general rule, if the required measurement accuracy is <1 degree, indirect measurement is probably not going to work reliably – or at least not for long. There are two parts to the problem – accuracy and reliability.
Inaccuracy comes from the number of factors in the (indirect) system’s tolerance stackup. For a system coupled by gears, thesefactors include (but are not limited to):
1. Encoder measurement accuracy.
2. Encoder thermal coefficients – i.e. drift inencoder’s output due to temperature.
3. Differential thermal expansion in gears,shafts, bearings, mounts, etc.
4. Gear backlash.
5. Gear Wear.
6. Concentricity of gears on shafts.
7. Gear train/tooth strain versus torque.
8. Shaft concentricity.
9. Variation of gear position with shock orvibration.
10. Tolerance on gear tooth position aroundthe pitch circles.
11. Tolerance on primary and secondaryshaft centre distance.
12. Variation in shaft centre distance - dueto load or bearing clearances.
13. Variations in lubrication – due toamount, type and thermal effects.
14. Mechanical friction – especially stictionat low speeds/torque.
15. Effect of foreign matter on gear teethsurfaces.
16. Twist due to torque in shafts.
17. Shaft bending due to side loading.
Each of these effects alone is probably nota major influence on accuracy. The problem arises because all these effects stack together. Experience shows that factors #1, 2,3, 5 and 10 are larger than most engineers expect.
A common misconception in #1 is that anencoder with 1,000 counts per revolution is accurate to 1/1000th of a rev. If you read the small print in the encoder specification, it soon becomes clear that resolution is not the same as accuracy. Also, any accuracy calculations should account for thermal coefficients(#2) and thermal expansion/contraction(#3) at the temperature extremes.
Factor 9 is notable, as this is often overlooked. A typical design approach is that if the primary gear has 100 teeth and the secondary gear has 10 teeth, then – becausethe gears are coupled (i.e. cannot jump atooth) – when the primary rotates once thesecondary gear rotates 10 times. This partis true, but when the primary gear rotates 0.37125 times, the secondary will not haverotated exactly 3.7125 times. This is because there is a tolerance on gear teeth position around the gear’s pitch circle, causing periodicnon-linearity. In other words, inaccuracy.Depending on how good the gearsare, the secondary will have rotated 3.7125+/- 0.1000 times.
Gear, pulley or chain systems are susceptible to foreign matter – especially in a large reduction gear train. This can often be overlooked by engineers who expect their equipment will always be operated within the specified envelope and all servicing willbe done by diligent, skilled personnel who always replace baffles and seals. Experience shows this is wishful thinking. Foreign matter often arises from unexpected, sometimes bizarre, conditions.
Alternative approach:direct measurement
As a general rule, if the position of an objectis to be measured accurately then the measurement should be made at, or closeto, the object. Measuring shaft angle directly simplifies the system and reduces the tolerance stack up. The result: improved accuracy and reliability.
So why doesn’t everyone use direct measurement? The reason is that, until recently, large bore rotary encoders were disproportionately expensive, delicate and difficult to fit.
Ring style optical encoders have been around for years but are expensive, bulky,need careful installation and are prone to failure with foreign matter. Similarly, large bore resolvers have been around for many years but their price, complex electrical supply/signal processing and bulk make them unsuitable for most mainstream applications.
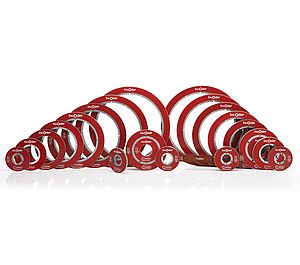
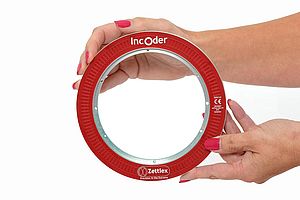
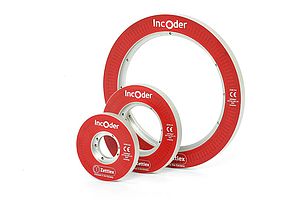
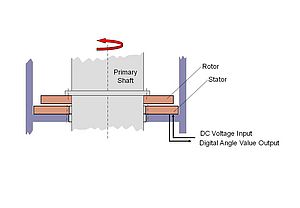
New generation inductive devices enable a simple, effective and accurate way to measure the angle of large diameter shafts. These devices work on similar principles to contactless resolvers and are just as reliable in harsh conditions. Rather than wire spools or windings they use printed, laminar windings. This enables a low profile, annular encoder ideally suited to large diameter shafts. The electrical interface is simple due to on-board electronics – DC voltagein; absolute digital data out. The mechanical arrangement of these new generation devices is simple and eradicates all gearing. The result: a simple, compact, lightweight, low inertia, accurate and reliable solution.


