Author details Markus Fabich, Product and Application Specialist for Materials Science Microscopy at Olympus SE & CO. KG
The characterization of surface properties is undeniably important throughout industry, and the technologies employed for this task are undergoing a shift. While stylus profilometry is well established, it is too slow to provide the necessary data or parameters to describe properties of those surfaces produced using modern fabrication processes, including self-cleaning surfaces and cylinder head surfaces in car engines. In these cases, a 2D or 3D measurement technique, such as 3D confocal laser scanning microscopy (CLSM), is mandatory to achieve the necessary lateral and height resolution. Moreover, CLSM is fast, efficient and does not touch the sample.
It is vital that such quantitative results are comparable to others globally, realized through traceable instruments calibrated with high-quality standards. Representing a defined set of parameters, these standards enable high precision and stable values. Currently, however, standards for the latest optical techniques are not yet fully comprehensive. In response to this, the German National Metrology Institute, the PTB, is working to establish robust and easy-to-use standards for the calibration, verification and validation of the main optical areal surface measurement technologies. In developing these new standards, the PTB chose the Olympus LEXT OLS4000 as a benchmarking tool, driving the next generation of industrial metrology techniques.
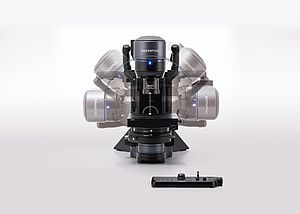
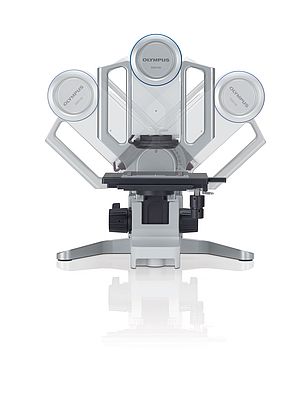
The Olympus LEXT is a key model for research and development, especially for new areal standards. This instrument is used to form good practice guidelines and facilitate the widespread application of optical metrology throughout industrial inspection and quality assurance. Many aspects of measuring areal parameters using optical metrology have been explored using the Olympus LEXT, including areal roughness, multi-step height determination, lateral resolution and lateral distortion in the field of view.
Developing areal standards
In order to develop novel high-quality standards, the PTB pushes the limits of optical metrology instruments: working beyond the manufacturer's specifications, the physical limit in determining measurement results and level of uncertainty is reached.
Areal roughness
Evaluating surface roughness over an area is a common task throughout industry, and it is important to look at how an optical technique such as CLSM compares to other approaches. Therefore optical measurements are compared alongside measurements from the atomic force microscope (AFM) instrument at the PTB. This AFM presents a reliable and accurately calibrated system against which to compare the resolution of CLSM using the Olympus LEXT. Studies indicated that the LEXT and the AFM agree over a long range of spatial wavelength, with the exception of a small range at a small spatial wavelength, where the AFM has an advantage in resolution (Figure 1).
Multi-step height determination
Calibrating the vertical axis of 3D microscopes typically employs a single-step height standard of appropriate height, however using this standard is time consuming and not as accurate in the case of structures covering a larger range of height values - such as microform or very rough surfaces. Thus, a standard for multi-step height has been designed and produced both in a microscopic and macroscopic range by the PTB, and exhibits several arrangements of steps for the different magnifications of the objectives to be calibrated.
Lateral resolution
For high-quality surface metrology it is mandatory to resolve the finest structures on surfaces. A high lateral resolution is therefore necessary, and is especially important in accurate and precise manufacturing tasks. Lateral resolution in surface topography measurements can be understood as the property to transfer the position-height data without resulting in large distortions, i.e. the better the agreement of measured to real profile, the higher the fidelity of the instrument. Based on this approach, the standard developed by the PTB tests the "profile fidelity" by measuring multiple gratings with grooves that have a constant amplitude but varied wavelength. As the wavelength decreases, the ability to measure the amplitude accurately is impaired. Hence, when we reach the limit of the instrument's profile fidelity, it is no longer able to measure height accurately.
Lateral distortion in the field of view
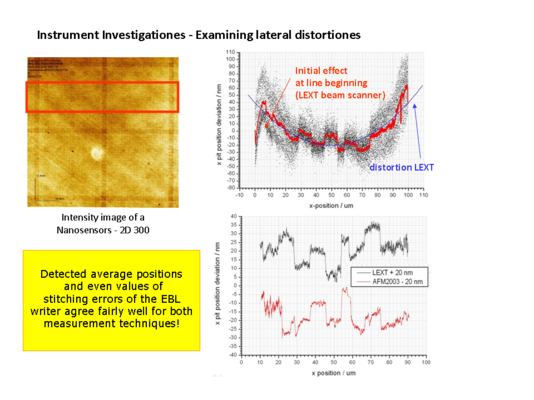
Evaluating the lateral distortion of optical imaging systems is also important for accuracy, since errors can arise from non-linearity. To compare lateral distortion in the field of view, a standard formed from a 2D grid was visualized using both CLSM, and AFM (Figure 2). Detected positions and even values of stitching errors of the electron beam lithography (EBL) writer used to produce these standards agree fairly well for both measurement techniques, indicating a highly accurate linear scale in the CLSM sensor.
Bringing optical metrology into the official domain
Facilitating the development of new areal metrology standards at the PTB, the Olympus LEXT system has played a central role in working towards the integration of optical metrology within industry. The development of reference standards in this way presents a first step towards enabling industrial workflows to benefit from the many advantages afforded through optical metrology.
