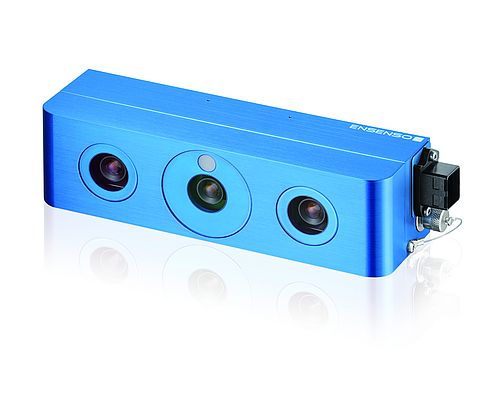
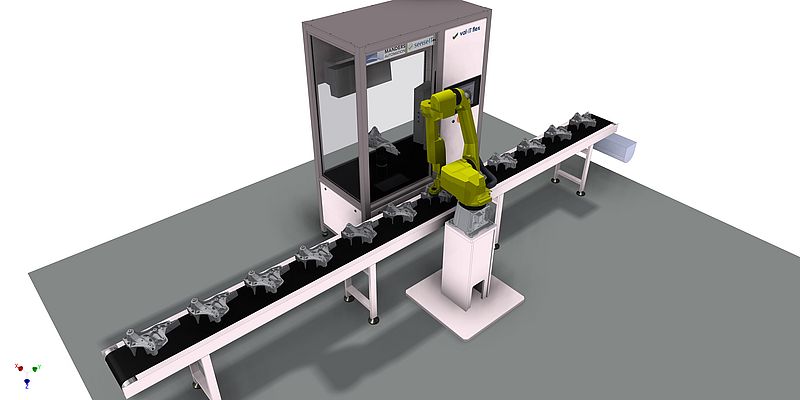
The Dutch technology company senseIT specialises in the development of fully automatic 3D inspection cells that can be used directly on the production line. This increases autonomy and ensures enormous time and cost savings. These inline inspection cells make use of Ensenso stereo 3D cameras from IDS Imaging Development Systems to take a close look at extremely complex components with the utmost precision and in less than 30 seconds. The system checks and validates the completeness of assembled products up to the size of a shoebox and is exceptionally precise in detecting faults: the software signals deviations in the tenth of a millimetre range which is beyond the capability of the human eye. This applies to all types of defects that can occur during production or transport: broken or missing parts, deformations, machining material, cavities or excessive burrs.
Inspection cell camera configuration
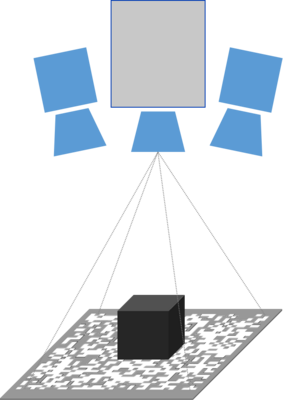
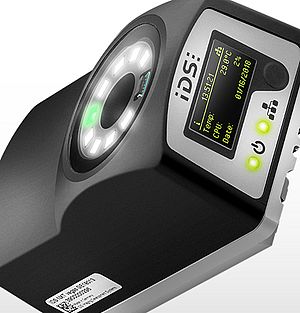
The val-IT Flex cell consists of a turntable and three Ensenso N35 3D stereo cameras containing two 2D IDS cameras to view the scene from different positions. The component to be inspected is placed on the rotary table with a diameter of 440mm and a height of 240mm and recorded from all sides. During a pre-programmed, complete 360° rotation, the cameras generate a high-resolution point cloud of the component. The object is captured with different integration times in order to do justice to the variance of the component properties. Although the cameras see the same scene content, there are different object positions according to the cameras projection rays.
Special matching algorithms compare the two images, search for corresponding points and visualize all point displacements in a disparity map. This is then used to calculate depth information for the resulting point cloud. The high intensity light projector of the Ensenso cameras ensures that the component to be inspected is captured as accurately, quickly and reliably as possible.
Image optimization and processing
Projection of a texture pattern onto the object enables high-contrast imaging of smooth or reflective objects or objects with weak structures, even in difficult lighting conditions, which in turn increases accuracy during matching. The Ensenso’s integrated light projector features FlexView technology. This uses a piezo element to move the pattern mask in the light beam which shifts the resulting texture on the object surface. A combination of several images of the same scene, taken with different structures, increases the number of pixels. This results in a higher resolution. All detected points are combined into a complete, high-resolution 3D point cloud representation of the component. Within the val-IT Flex inspection cell this is then compared with a CAD reference model and projections of the product.
3D machine vision algorithms from the HALCON image processing library from MVTec are used by senseIT for the acquisition and processing of the point cloud. In addition, the company has developed specific measurement and processing algorithms and integrated them into HALCON via extension packages. Hardware acceleration ensures that the entire processing time is within 30 seconds. All data of the recorded component with possible deviations are displayed on a comfortable user interface. The deviations can, for example, be displayed per lot, article number or period. It is quick and easy to see whether the scanned components have repeated errors and which errors have occurred during production or transport, for example. This enables the user to react quickly and readjust the manufacturing or transport process.
Time savings and increased productivity
All information about individually validated parts is stored in a large database. In this way the val-IT Flex is able to carry out statistical analyses which provide information about recurring errors in the manufacturing process. The results of the analysis are clearly presented in a secure online portal. Information about detected defects presented in real time reduces the feedback time and improves the delivery quality in the subsequent process. Insights into these repetitive errors help to optimize the entire manufacturing process. Quality costs, labour costs or penalties for non-compliance with quality standards are significantly reduced. In addition, the user can easily and intuitively teach the system new or modified components and make tolerance settings. This reduces product changeover times to a minimum and enables effective utilization of the system. The return on investment is achieved in just a few years.
Another major advantage is that the scanning and validation process is fully automated and requires no human interaction. This eliminates human interpretation errors caused by fatigue and distraction. Fully automated inline inspection saves time by increasing the measuring speed and increases productivity by detecting faulty parts at an early stage. The manufacturing process can be modified early enough to prevent defects. This is particularly important in the production of large product batches. Such an optimization of the quality assurance process will contribute significantly to the reduction of quality costs in the factory of the future.


